Methods for Resizing 3D Laser Cut Models without changing Material thickness
Share
🔹 Introduction
Sometimes, you need to scale a 3D model up or down, but keep the same material thickness it was originally designed for.
In simple terms — you want to change the overall dimensions of the model, but keep the slots and joints fitting your current plywood thickness.
Below is a short overview of several practical methods, from beginner-friendly to more advanced.
❌ Why Simple Scaling Doesn't Work
If you just resize the whole file proportionally, everything gets scaled — the body, slots, holes.
As a result, the joints no longer match the material thickness they were designed for, and the parts won't fit together correctly.
1️⃣ Manual Adjustment After Scaling
The most straightforward — but also the most time-consuming — approach is to manually fix every slot after scaling:
- Adjust slot width and depth
- Rework joint dimensions
- Modify each connection one by one
🟡 This method gives you full control,
🔴 But it takes a lot of time and attention, especially for complex designs.
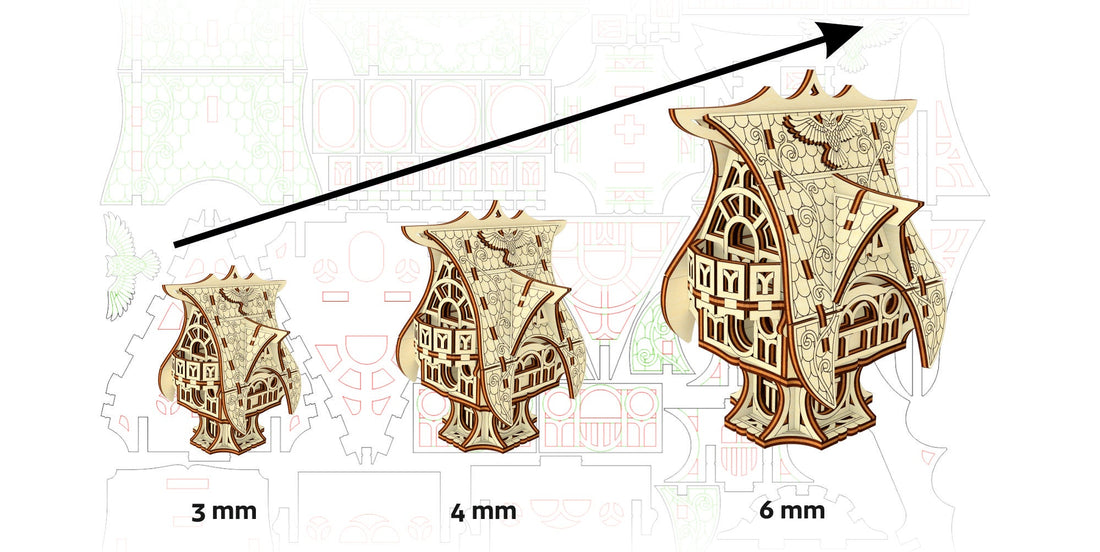
2️⃣ Scaling for a Different Material Thickness
One of the easiest and quickest methods is to simply use a different plywood thickness and scale the model to match it.
🛠 How to do it:
- Determine the new material thickness (e.g. 4 mm instead of 6 mm).
- Calculate the scale:
Scale = New Thickness / Original Thickness
Example: 4 mm / 6 mm = 0.6667 (or ~66.67%) - In your vector or laser software:
Select the entire design and scale it uniformly to 66.67%.
✅ This way, slots and joints match the new material thickness.
❗️ Downside: You no longer control the final physical size of the model.
But if you have access to different material thicknesses, it’s a very effective method.
3️⃣ LightBurn – Resize Slots: Semi-Automated Slot Adjustment
LightBurn has a built-in tool called Tools → Resize Slots that allows you to automatically adjust joints to fit a new material thickness.
⚙️ Here's how it works:
- Input:
- Old Material Thickness — your original value
- New Material Thickness — your new desired value
- Optional adjustments:
- Slot Depth
- Slot Width
- Tab Height
▶️ Click Apply / OK, and LightBurn adjusts the geometry.
📘 Full documentation:
🔗 https://docs.lightburnsoftware.com/latest/Reference/ResizeSlots/
⚠️ Limitations:
- Works only with ungrouped, sharp-edged geometry
- Supports specific joint types only
☑️ The result should be double-checked,
but this tool saves a lot of time, especially if you understand how the model is built.
4️⃣ Parametric CAD Models
This method is for advanced users.
In professional CAD software (e.g. Fusion 360 or FreeCAD), you can create parametric models where values like material thickness, joint size, and part dimensions are defined as parameters.
✅ Advantage: You change just one value (like thickness), and the entire model updates automatically
❌ Disadvantage: It takes time to build and is not ideal for quick or one-time designs
✔️ But for batch production or your own reusable design library, it's a powerful method
🧱 Box generators
These work on the same principle.
For example, MakerCase lets you generate designs based on your desired thickness and dimensions:
5️⃣ Innovation: The autoAssembler Project
For those interested in cutting-edge developments, there is an exciting research project called autoAssembler by Thijs Roumen and his team.
This software:
- Imports your laser-cut file
- Automatically reconstructs a 3D model from it
- Allows you to change material thickness
- And adapts all joints accordingly, fully automated
⛔️ The software is not yet publicly available — it’s still in development.
✅ But the idea is incredibly powerful and truly inspiring!
💬 Share Your Thoughts
- Have you tried any of these methods before?
- Which one do you use most often?
- Do you know any alternative techniques? Feel free to share them!